# Jira On-Premise
This guide provides detailed instructions for integrating Jira with ReleaseOwl to streamline user story management and automation. After successful configuration, ReleaseOwl automatically fetches **Projects**, **Sprints**, and **User Stories** from your Jira instance based on the settings you define.
To enable continuous, real-time synchronization of User Stories, Jira must be configured with appropriate **Webhooks** or **Automation Rules**. These configurations ensure that ReleaseOwl receives updates instantly whenever changes occur in Jira.
### **1. Jira Environment & Connectivity Requirements**
Ensure that the following prerequisites are met before configuring the integration:
* **Jira URL is reachable** from ReleaseOwl
* **Basic Authentication** is enabled
* **REST API endpoints** are accessible
* If Jira uses an **IP Allowlist**, ensure ReleaseOwl’s IP/domain is added to the allowed list
### **2. Required Jira Global Permissions**
The Jira user account configured in ReleaseOwl must have the following permissions:
* **Browse Users**
* **Create Shared Objects** (optional, but recommended for shared filters and boards)
### **3. Register Jira On-Premise Credential ( Basic Authentication)**
Follow the steps below to register your Jira credentials in ReleaseOwl:
1. Go to the ReleaseOwl Dashboard.
2. Navigate to **Administration**, then select **Credential Manager**.
3. Click on **Register Credential**.
4. Fill out the credential form with the following details:
* **Credential Name:** Enter a preferred name for this credential.
* **Credential Type:** Jira
* **Authentication Type:** Basic
* **Scope** – Select the scope of the credential:
* **Global** – Visible to all users.
* **Private** – Visible only to the user who created it.
* **Username:** Provide the username associated with the credential (e.g., Jira account)
* **Password/API Token**: Enter the password or API token for authentication with the chosen system.
* **Jira URL:** Paste your local or organization-specific Jira URL
* **Proxy Type:** None
5. Click **Save** to complete the credential registration.
{% hint style="info" %}
**Note:** Do not paste the Bearer Token in the Password/API field under Basic Authentication, as it will not work. Always select **Bearer Token** as the authentication type.
{% endhint %}
### **4. Register Jira On-Premise Credential (OAuth Authentication)**
Follow the steps below to register your Jira credentials in ReleaseOwl:
1. Select **Applications** from the Jira administration menu.
2. In the **Applications** section, click **Application Links**, then click **Create link**.
3. For **Application type**, select **External Application**.
4. For **Direction**, select **Incoming**, and then click **Continue**.
5. Under ***Application Permissions***, select only ***Admin***** permissions**.
6. For the **Redirect URL**, enter:
7. Click **Save**.
8. After saving, copy the **Client ID** and **Client Secret** for use in ReleaseOwl.
#### **Registering Jira in ReleaseOwl Dashboard**
To integrate Jira with ReleaseOwl for issue tracking and traceability, follow the steps below to register Jira credentials and set up project integration.
1. Go to the ReleaseOwl Dashboard.
2. Navigate to **Administration**, then select **Credential Manager**.
3. Click on **Register Credential**.
4. Fill out the credential form with the following details:
* **Credential Name:** Enter your preferred name for the credential.
* **Credential Type**: Jira
* **Authentication Type**: Select the authentication type as theOAuth2
* **Scope** – Select the scope of the credential:
* **Global** – Visible to all users.
* **Private** – Visible only to the user who created it.
* **Client ID and Client Secret:** Paste the Client ID and Client Secret obtained from the OAuth2 integration you created in the Atlassian Developer Console.
* **Jira URL**: Paste your local or organization-specific Jira URL
* **Proxy Type**: Select None
5. Click **Save** to register the credential.
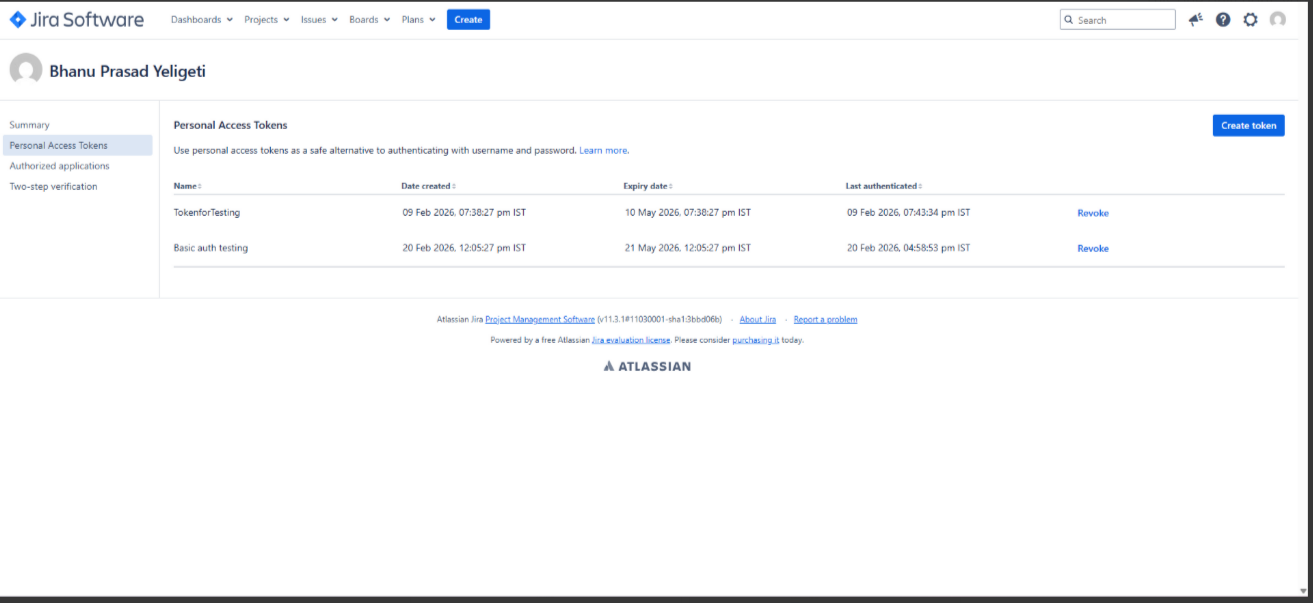
### **5. Register Jira On-Premise Credential ( Bearer Token)**
* Log in to your Jira account.
* Navigate to your **Profile** in Jira.
* Click on **Create Token**.
* Provide the required details (such as token name and expiration, if applicable).
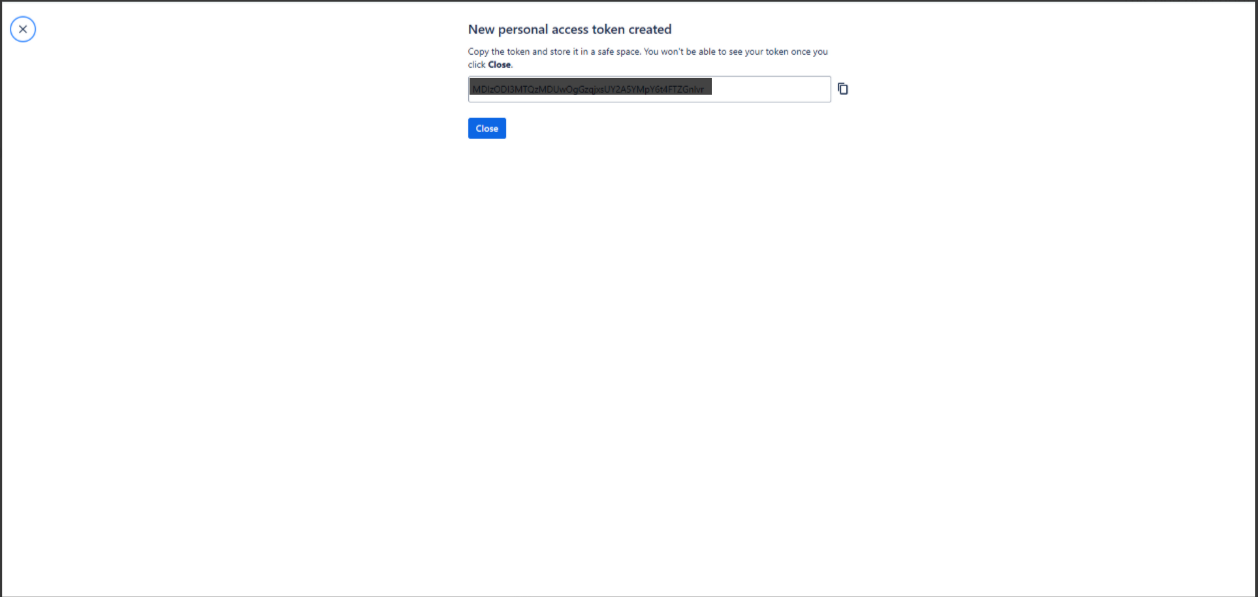
* Click **Create** to generate the token.
* Copy the generated **Bearer Token** for use in ReleaseOwl credential configuration
#### Jira Bearer Token Integration with ReleaseOwl
To integrate Jira with ReleaseOwl for issue tracking and traceability, follow the steps below to register Jira credentials and set up project integration.
1. Go to the ReleaseOwl Dashboard.
2. Navigate to **Administration**, then select **Credential Manager**.
3. Click on **Register Credential**.
4. Fill out the credential form with the following details:
* **Credential Name:** Enter your preferred name for the credential.
* **Credential Type**: Jira
* **Authentication Type**: Select **Bearer Token**.
* **Scope** – Select the scope of the credential:
* **Global** – Visible to all users.
* **Private** – Visible only to the user who created it.
* **Token:** Paste the copied **Bearer Token**.
* **Jira URL**: Paste your local or organization-specific Jira URL
* **Proxy Type**: Select **None**
5. Click **Save** to register the credential.
## **Jira Project Integration**
To link a Jira project with a ReleaseOwl project, follow the steps below:
### **1. Navigate to Project Settings**
* Switch to the required working project in ReleaseOwl.
* Go to **Project Settings**.
* In Project Settings, navigate to **ALM Integrations** and click **Add**.
### **2. Fill in the Required Details**
* **Name:** Enter a unique integration name.
* **Description:** (Optional) Add a relevant description.
* **External System:** Select Jira.
* **Credential:** Choose the registered Jira credential.
* **Host URL:** Jira Server URL (e.g., [*https://jira-dev.releaseowl.com/*](https://jira-dev.releaseowl.com/)).
### **3. Select Hosting Type**
* Choose **On-Premise** if your Jira runs on a private server.
* Choose **Cloud** if your Jira instance is hosted on Atlassian Cloud.
### **4. Select External Project**
* Choose the Jira project from the pop-up list.
#### **A. Using Boards**
* Select **Boards** to sync issues using a specific Jira board.
* **Board:** Choose the required Scrum or Kanban board.
* Click **Save**.
Once saved, the integration appears in the list. If **Default Integration** is selected, it will be used by default.
#### **B. Using Filters**
* Select **Filters** to sync issues using Jira’s saved filters.
* All available filters that user has permission will be displayed.
* Choose the desired filter.
* Ensure the filter has proper permissions and is shared with required users.
#### **C. Using JQL (Jira Query Language)**
* Select **JQL** to fetch issues using advanced queries.
* Create a JQL query in Jira.
* Copy and paste the query into ReleaseOwl.
### **Note**
* **Webhook URL:** Auto-generated by ReleaseOwl and used to capture and sync Jira events.
* **Webhook Request URL for Automation Rule:** Also auto-generated by ReleaseOwl.
* **Disable Writing of Comments/Notes:** An optional toggle that allows you to control whether comments or notes are automatically added.
## **Configuring the Webhook URL**
ReleaseOwl supports automatic synchronization of user story changes made in Jira through webhooks.
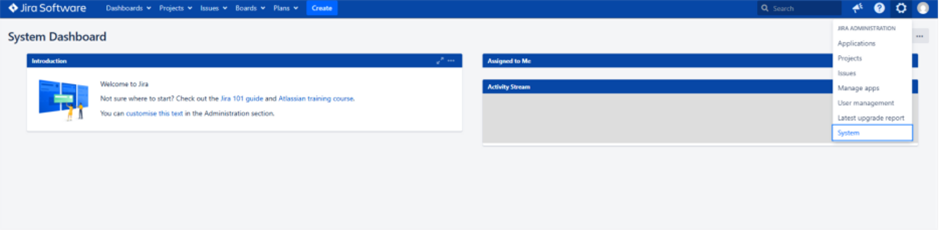
1. Log in to your Jira account.
2. Go to **Settings → System → WebHooks**.
3. Copy the Webhook URL generated in ReleaseOwl.
4. Paste it in the **URL** field on the Jira WebHook configuration page.
5. In the events section, instead of all events it is recommended to add filter condition for Project.
6. Select the issue-related events that you want to track for your project (e.g., story creation, updates, etc.).
7. After entering all the details, you can enable or disable the webhook in the status section.